Oauth 2.0
Applications that use the OAuth 2.0. To generate the auth token you will require:
Access Token UR, ClientID, Client Secret Tenant ID and Call back URL.
This can be obtained from the admin panel of auth service provider.
Steps to Generate an OAuth 2.0 Access Token:
Collect Required Information:
Before starting, gather the following details from the admin panel of your OAuth service provider:
- Access Token URL
- Client ID
- Client Secret
- Tenant ID (only for Authorization Code grant type)
- Callback URL (only for Authorization Code grant type)
- Endpoint (only for Authorization Code grant type)
- Auth URL (only for Authorization Code grant type)
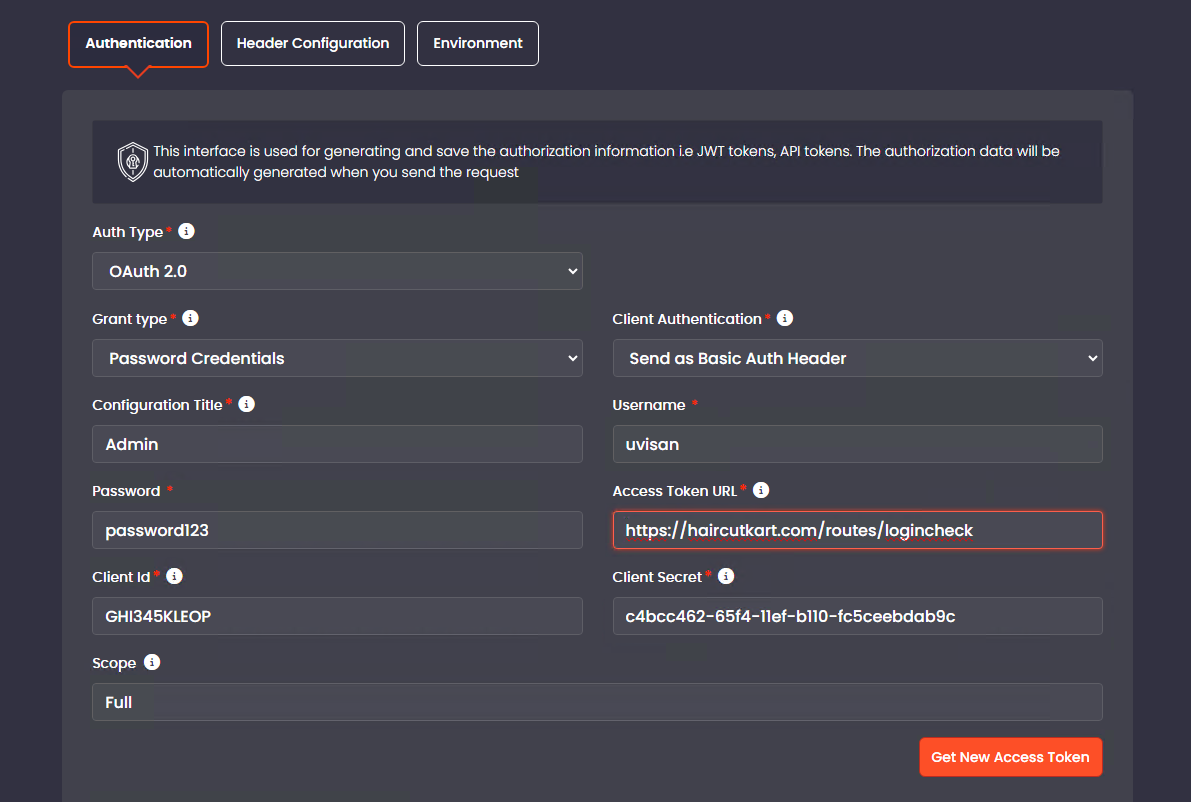
Configure Token Generation:
- Grant Type: Choose the grant type as either Authorization Code or Password Credentials.
- Client Authentication: Select how client credentials should be sent—either:
- As a Basic Auth header, or
- In the request body.
Enter Configuration Details:
- Title: Provide a name for the configuration.
- Callback URL: Enter the callback URL (e.g., https://your-application.com/registered/callback-url).
- Auth URL: Enter the authorization URL (e.g., https://example.com/login/oauth/authorize).
- Access Token URL: Enter the access token URL (e.g., https://example.com/login/oauth/access_token).
- Tenant ID: Enter the tenant ID if you're using the Authorization Code grant type.
- Client ID: Enter your client ID.
- Client Secret: Enter your client secret.
Generate the Token:
- Click on the Get New Access Token button.
- A pop-up will appear asking for additional details.
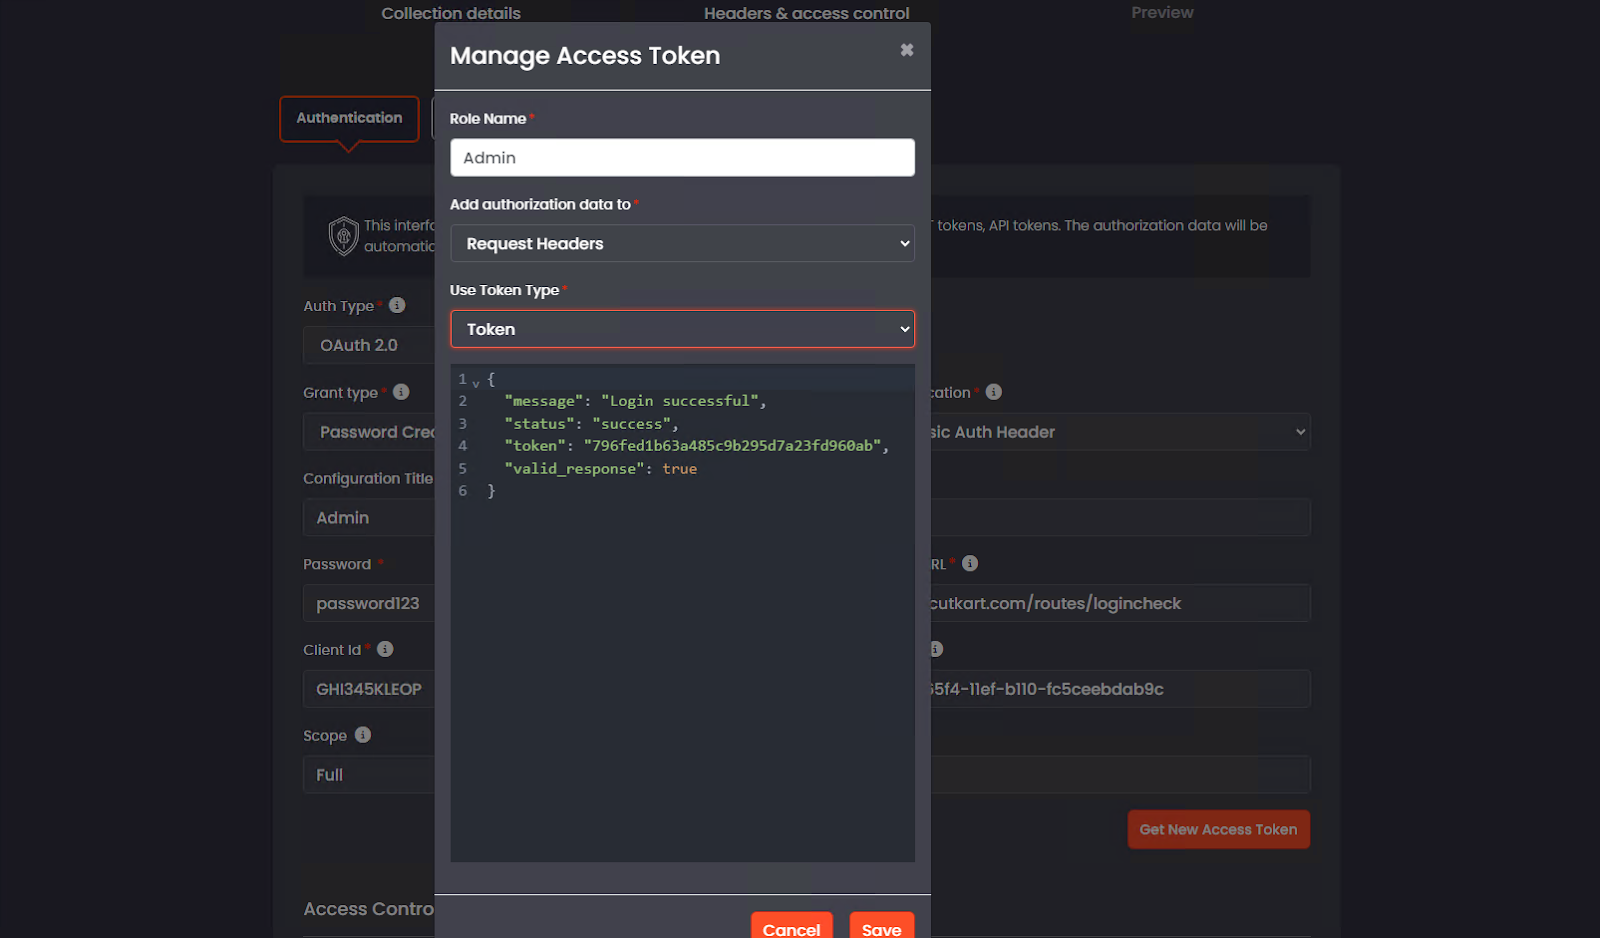
Specify Role:
- In the pop-up, provide the Role (e.g., admin, customer, end-user).
Save the Token:
- Click Save. The token will be stored and displayed in the Access Control Configuration table.
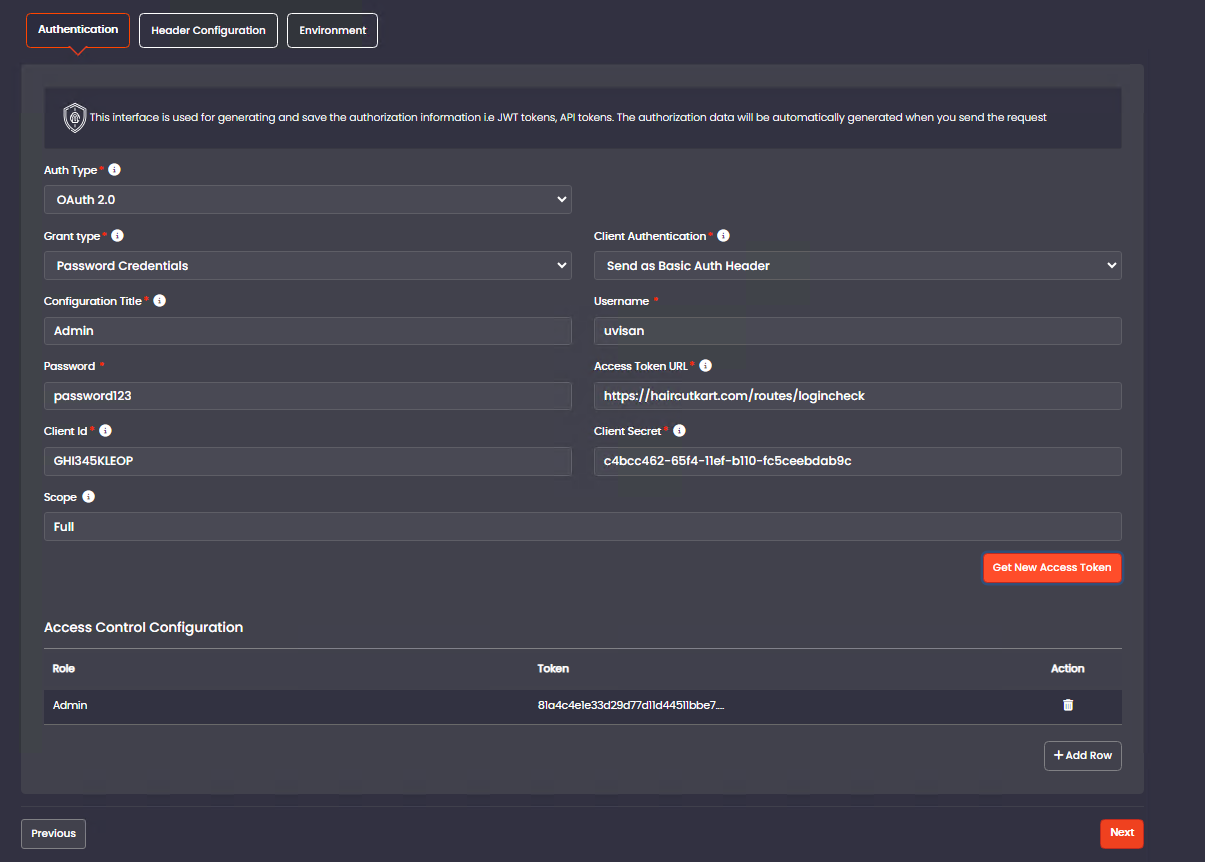
User can also add the auth token manually, follow these steps:
- Click the +Add Row button to insert a new blank row.
- In this row, specify the role associated with the token, such as "admin" or "customer."
- Enter the corresponding token in the appropriate field. Press the Enter key to save the token. The system will confirm that the token has been saved successfully.